Learning touch typing is a lot more challenging for a seasoned hunt-and-pecker. Years and years of acquired habits are difficult to unlearn. Additionally, having daily tasks to keep up while learning to touch type, and the fact that initially touch typing is even slower than hunt-and-peck style doesn't help with the situation. However, following a disciplined process can alleviate most of the difficulties.
TL;DR
Here is a super compact summary of the process for the impatient:
-
Step 1 : Go to www.typingclub.com and complete all lessons up to at least lesson 188. (3-5 days of hard work)
-
Step 2 : Go to www.typeracer.com to improve your speed up to 30-35. (2-3 weeks)
-
Step 3 : Make the switch: cover your keyboard with black keyboard stickers. (This is the point of no return)
-
Step 4 : Continue practicing to get faster and more accurate.
What follows is a somewhat more detailed explanation of these four steps.
Step-1: Learn the basics (3-5 days)
First step is the most difficult step in this whole process, because you will have many moments when you feel like you won't be able to do this at all. You will possibly question yourself, the method, and the anatomy of your fingers… :)
I had my moments as well. Some letters seemed too hard to reach for my fingers using the touch typing technique, I had doubts especially about the health of my left little finger for a while. Then, at some point, I realized that I couldn't get my fingers to stand still resting on the home row for a while, they were pressing keys now and then unintentionally. I thought maybe it is too late to learn this technique for me at this point. But I diligently followed the exercises and all my worries just disappeared as my hands and fingers started to cooperate.
This step is indeed very short. Just follow the method, and be patient. A few days later, you will be a touch typist! An extremely slow one, though. We will think about the speed later.

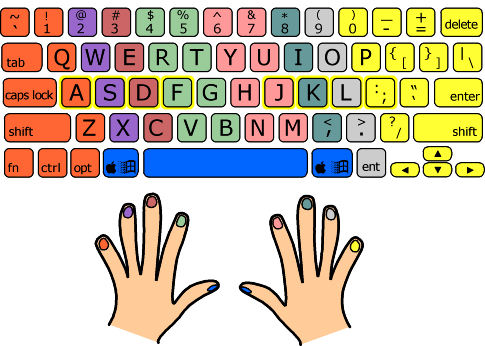
The basic idea of the touch typing method is assigning the keys on the keyboard to specific fingers as shown in the image above. During the first few days, you will follow online exercises to do the following:
-
learn the "home row" and how to put your fingers on the home row without looking
-
memorize the letter finger associations
-
learn how to type without looking at the keyboard
We will use www.typingclub.com to learn the basics of touch typing. Go to the site, create an account to track your progress (it's free), and complete the lessons 1-135. Don't feel overwhelmed by the large number of lessons, they are very short and each one usually takes a few minutes to complete.
While following these lessons, make sure you never look at the keyboard. You can put a towel over your hand to fight with your habit (no kidding!).
Also, focus on accuracy rather than speed during the lessons. Speed will come naturally. Ideally you should get five stars from a lesson before you move to the next, but that can be quite tiresome. So, instead I used four stars as the passing criteria for myself. This gives you the right balance between completion speed and typing accuracy.
Finally, make sure that you watch the instruction videos that appear from time to time as they explain some critical concepts like home row, posture, muscle memory, etc. Don't try to skip them to complete the lessons fast.
If you were able to get up to this point completing the lessons I mentioned above, congratulations! You did great, and you lit the fire. You completed one of the most difficult steps, so never stop from now on. Now it is time to cover the remaining gap, and then improve.
Now complete lessons 136-188, to learn how to use the shift key.
Step-2: Live two lives for a while (2-3 weeks)
At this point, you should have learned all the basics of touch typing, and you can actually touch type. Well… with a small (!) glitch: your touch typing is unbearably slow.
When I came to this point, I was able to touch type around 8 WPM (just eight, no typo)! Compared to my hunt-and-peck speed of 45-50 this was like a joke. I knew this would quickly improve if I started doing all my typing using the proper touch typing method, but this was not feasible at all. Even writing a short email would take more than 10 minutes with this approach. Besides, I do interviews regularly at work, and as I mentioned in the previous post, we need to take extensive notes during the interviews. So, there was no way that this would work. So, what I had to do is to live two different lives for a while.

[[https://www.youtube.com/embed/fosG7tmWTZ8]["As you can see, we've had our eye on you for some time now, Mr. Anderson. It seems that you've been living two lives"]
Following my approach, you will use your old typing style during the day, and you will try to use the proper touch typing method after work. A hunt-and-pecker during the day, and a touch typist in the evenings.
Continue working on the lessons of www.typingclub.com to improve your speed. As soon as you get close to 20 WPM, start using www.typeracer.com as well. Typeracer accounts are also free, and typing at typeracer is more fun as you have some competition. By the way, the reason we don't go to typeracer before is, you are too slow at this point and you simply cannot complete any race before the timeout! It's sad, I know… But it will be over shortly.
Step-3: Make the switch
When you reach about two thirds of your hunt-and-peck style typing speed, make the switch. In my case I waited until I can get to 30-35 WPM.
What do I mean by making the switch? I mean, making it (almost) impossible to revert to your old typing method. The method I used for this was simply blanking out my laptop keyboard.

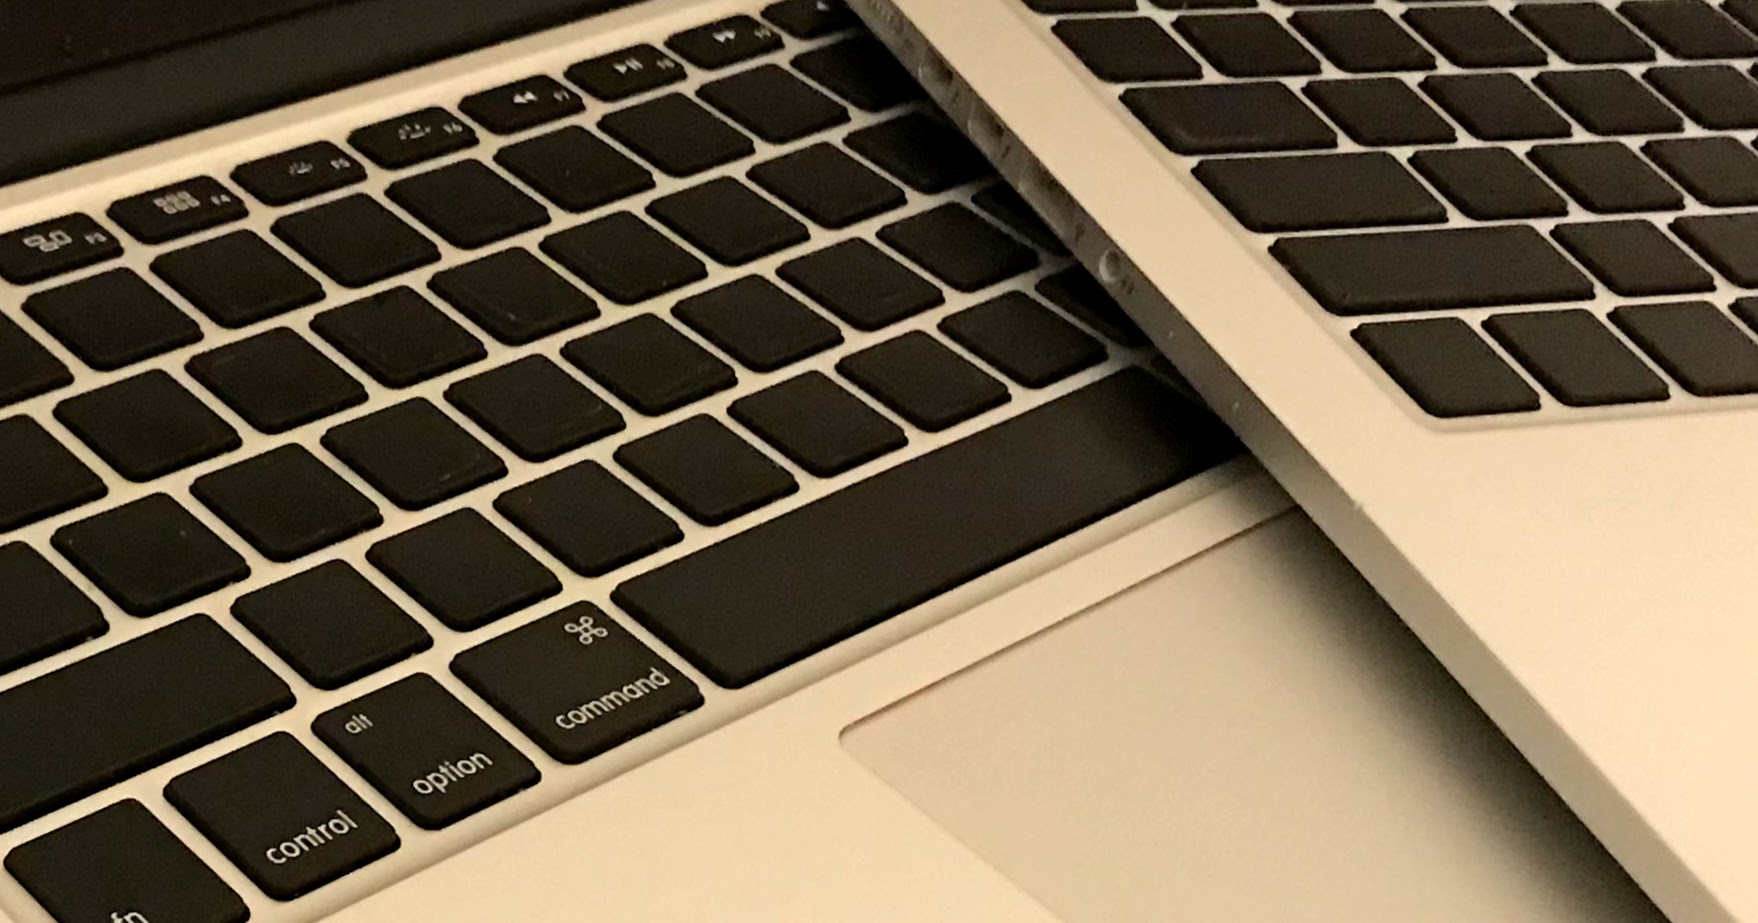
Buy black stickers (this one, for instance), and blank out your keyboards as seen above. You might want to start with blanking out letters only, and as you learn symbols better, you can blank them as well.
Step-4: Improve your speed and accuracy
After you make the switch, your speed and accuracy will gradually improve as you do your regular work and use touch typing continuously. This process will probably take too long, and you might even get stuck at a considerably low speed this way. What you need to quickly improve your speed and accuracy is to keep working on the touch typing exercises. Here is what I did (and still doing, although less frequently):
-
I used typeracer regularly to practice. It is also a lot of fun if you race with friends here.
-
I also worked on most of the remaining typingclub lessons.
After doing all those practices, some keys still felt a little awkward. Especially some of the symbols like [,], {, }, | - which are all assigned to the same finger - was hard to type accurately. Then, I discovered another touch typing site: www.ratatype.com. The exercises on this site are more focused towards improving muscle memory with more accuracy. I felt much better after I completed the lessons on ratatype focusing on these symbols.
Another thing I would like to improve was typing while programming. As you well know at this point, the sites I mentioned up to now all focus on typing regular text, like a part of a book. There is another site which focuses on typing for programming: www.typing.io. I used this site (although not as often) to practice typing programs. The site allows typing source code in many different languages ranging from common ones like C, C++, Java to less common ones like Erlang and Haskell.
Finally, sometimes you need some more fun to keep up practicing. When I felt bored with typing excerpts from books or parts of programs, I played touch typing games. Check google for that, there are many online touch typing games.
This last step is a never ending one. The more you practice, the faster you will improve your speed and accuracy.
Further tips
Now you know a working process which can get you up to speed in a few weeks. Time to get the wheels turning. Before you go, I would like to give you some further tips below.
Buy a good keyboard
Consider buying a good keyboard before you start the process. This can improve and help sustain your motivation. You could feel much more comfortable typing with a good keyboard. And you can keep practicing longer, as it causes less strain in your hand.
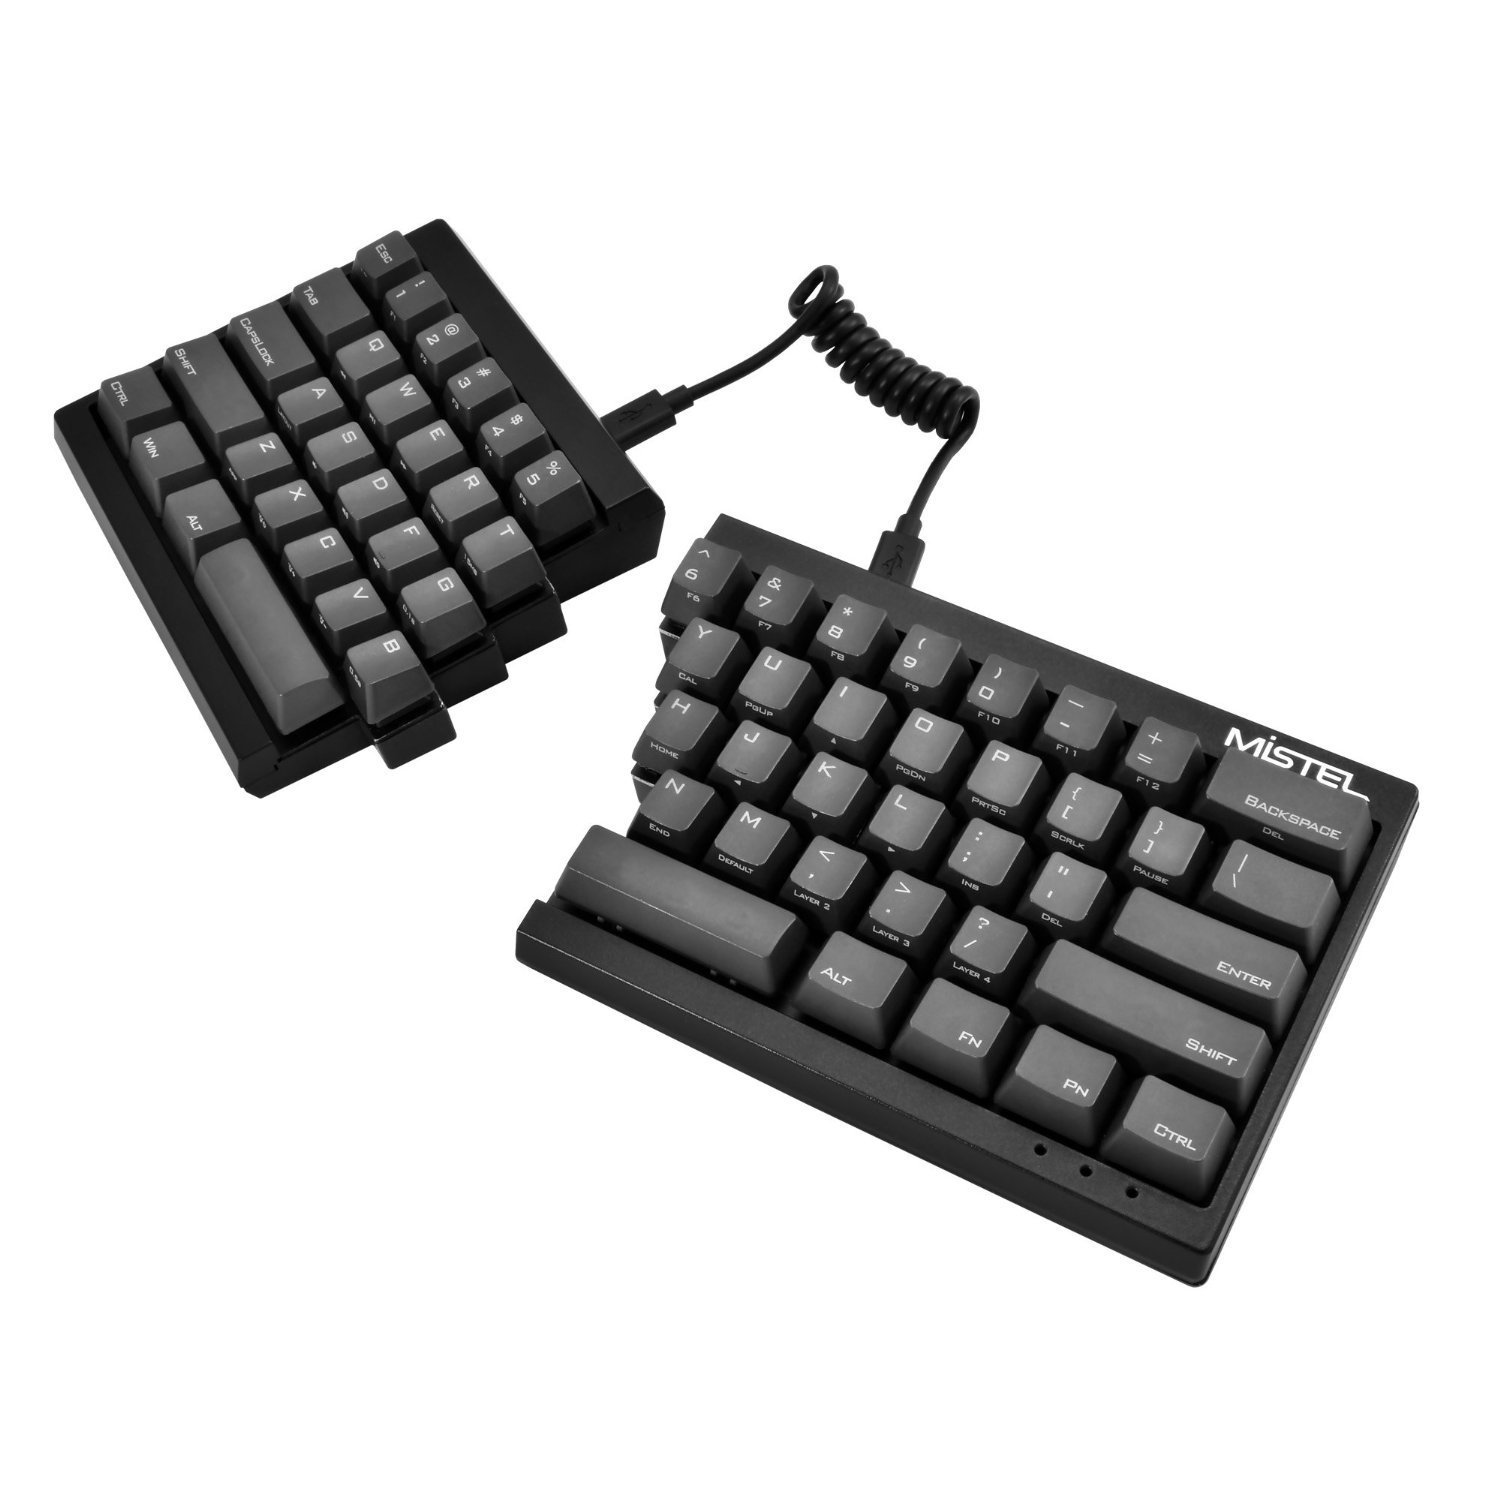
After careful consideration, I chose the following one: Mistel Barocco Ergonomic Split Keyboard. You can see a picture of this keyboard below.

Note that good keyboards are not cheap at all, but if you are making a living out of a job that requires continuous interaction with a computer using keyboards, I believe the benefits would outweigh the cost easily. Additionally, the extra money paid for the keyboard can be a factor for keeping motivation to move forward with the exercises
Find some competition: Have fun learning
Going through the process I explained in this post would work if you follow this by yourself. However, if you can find someone who is willing to learn with you, this could turn into a fun activity.
In my case, I went through this process with my daughter. This turned into a huge competition at times, which pushed us to work harder to get faster than one another. It was a lot of fun. In the end, I couldn't keep up with my daughter's young pianist hands, and she was able to hit 100 WPM at times, while I was still not able to pass beyond ~80 WPM.
Concluding remarks
If you followed this post up to this point, that means you are sincerely interested in learning touch typing or improving your typing speed (or you just had some free time :) ). I assure you that this is one of the most beneficial investments you will make for your professional development. You will give only a few weeks and then the investment will pay off every day thereafter.
Happy touch typing!